Glass fusing with ferns: the main job

Having tried out a few different techniques for glass fusing with ferns, and finalising the best, I have now moved on to the main reason for all this, the insert for the oak tray I am currently carving.

I started with 3 ferns coated with green glass powder.

These were fused to a sheet of clear glass.

With the carbon residue from the ferns themselves removed, this left the glass powder behind, reflecting the fern shape and form.

Next the sheet was turned upside down and a sheet of opaque white  glass put on top, as the background.

This meant that what was to become the top surface was against the kiln plate. The reason I did it this was around was to give the top surface a textured finish to match the fern feel. The glossy, shiny top surface of the glass in then on the bottom and hidden.

The result is below:


I  have tried to show the silk surface texture in this picture.

All I need to do now is complete the oak tray which this will be inserted into.


Fused glass on a cold day

What more could you want other than to play with fused glass on a cold day?

 
fused glass tea lightI have made my first deep slumping mould, to make a simple tea light holder, and I have to say it all worked quite well.

The piece is made from 2 square sheets, offset, and with confetti glass sandwiched between them.

I first fired it on a regular fusing programme to make the flat design.

For the slumping stage I made a simple mould from vermiculite sheet, with a hole in it, to allow the glass to fall.

fuaed glass dishI also used the kiln space to slump the ‘bubble’ sheet I made a few weeks ago into a dish.

Some of the bubbles are a little larger than I would ideally like, but it is an interesting design that I will play with again.

What next? Well watch this space, as, inspired by our holiday in South Africa and the principle of ‘leave only footsteps’, I am currently having a go with casting glass.

I have been researching mould making and have all necessary bits and pieces. All I need now is time.


Fused glass – not that easy

IMG_20160227_114333I have been having a go at some new glass fusing techniques, notably crackle. it starts with powder, sprinkled over a base sheet, sprayed with water and then pushed into crackle type effects. A piece of clear glass (tekta) is then put on top.

This is how it looks after the process. I tried an additional variant, where one base sheet was scrunched up first. the idea being that this helped form the crackle look.


IMG_20160227_171438

IMG_20160228_160649I added a sheep and some bees to the kiln load, far left. The idea being that the bees could be my first move into selling glass items.

The near left picture shows the results. The sheep and bee have come out well. The crackle glass however, hasn’t. It looks like, well, clear glass with melted powder. A bit of a failure really. If you want to see how it should be done, then visit here.

Back to the drawing board on that one. I just need to work out what I did wrong.


Fused glass hens and bees

fused glassWe have been making fused glass hens and bees, along with a few other bits and pieces. This is the final result post firing. For this run I reduced the temperature to 795 degrees C for 10 minutes as I felt that the 800 degrees C run was slightly over cooked and melted.

This is how it all started for the hen:

fused glass henIMG_20160124_131906IMG_20160124_133607


IMG_20160124_152612And this is the kiln shelf full of hens, bees and beads. I am also refiring the plate I was trying to make into a dish, but for which I overdid the bubbles. I have since popped them and am putting them through the kiln again to flatten it down, before I make it into shallow bowl.


Fused Glass work

We are always interested in learning new craft skills. Working with glass has always particularly interested us, perhaps because it is so permanent. The colours will never fade, the finish will never tarnish and it will never wear. It also makes use of light to show itself off and light is a wonderful natural thing.

Having said that, glass is a very difficult material to work with, both because it is inherently breakable and limited in what you can produce shape wise, and because there is a firing process that changes what you have assembled. Some glass, like pottery glaze, also changes colour on firing.

Whilst visiting a farmers’ market a couple of weeks ago we stumbled upon this lady and within a week were on an ‘introduction to fused glass’ course. We had a great day with her, and only 1 other student, who had some previous experience. We were therefore able to compress our ‘introduction’ and move on quickly to some more advanced work.

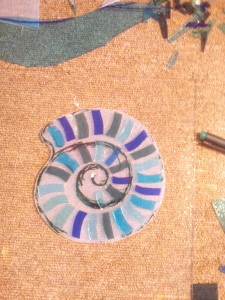
fused glass finishedI made 2 pieces on the course. The first was an ammonite. This was made from a flat piece of lace glass, overlaid with coloured ‘segments’. It then had fibre board placed behind it to give embossed grass shapes. I then added green ‘strings’ to the front to add some accent to the grass. The pictures below show work in progress to achieve the final fired result above.

fused glass workfused glassIMG_20151210_140300