We have been experimenting with our new glass fusing kiln. The latest project has been a 25cm diameter glass fused plate. This is how it finished:

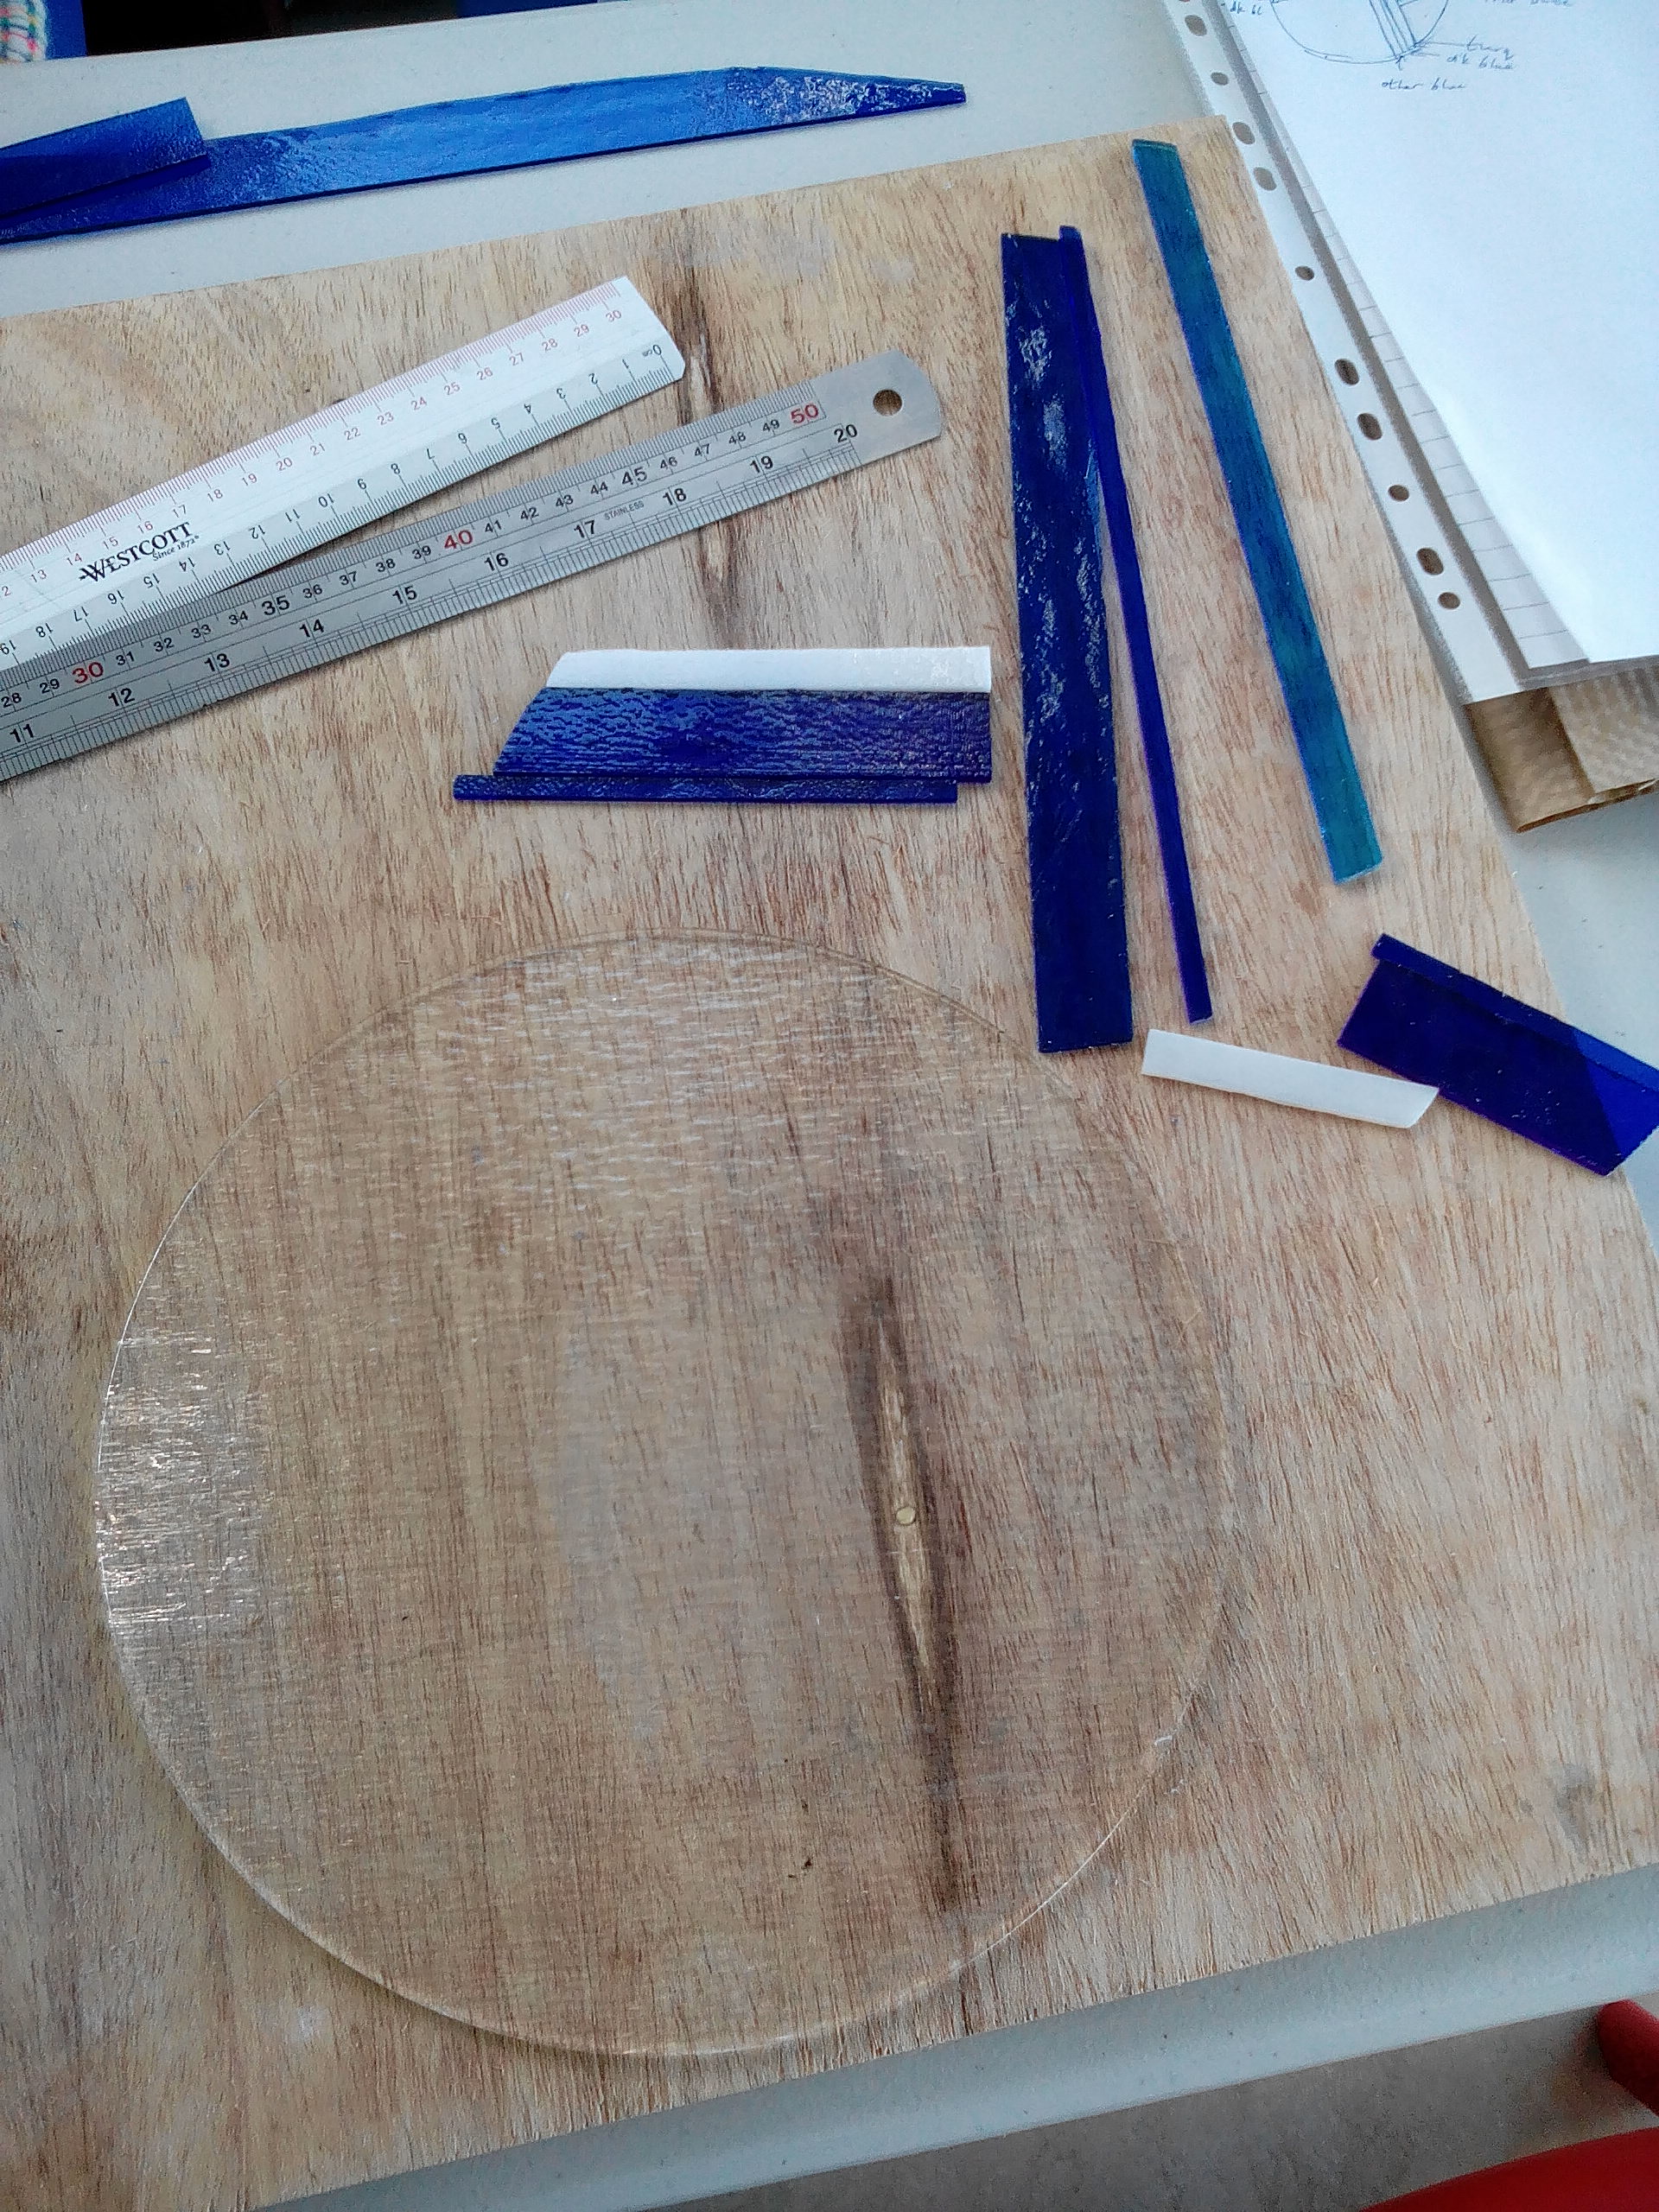
As you can see below, it began with a sheet of clear glass and some blue and white strips.
The second picture shows the strips in place on the clear base. I am also making some curved glass rods using a small blowtorch.
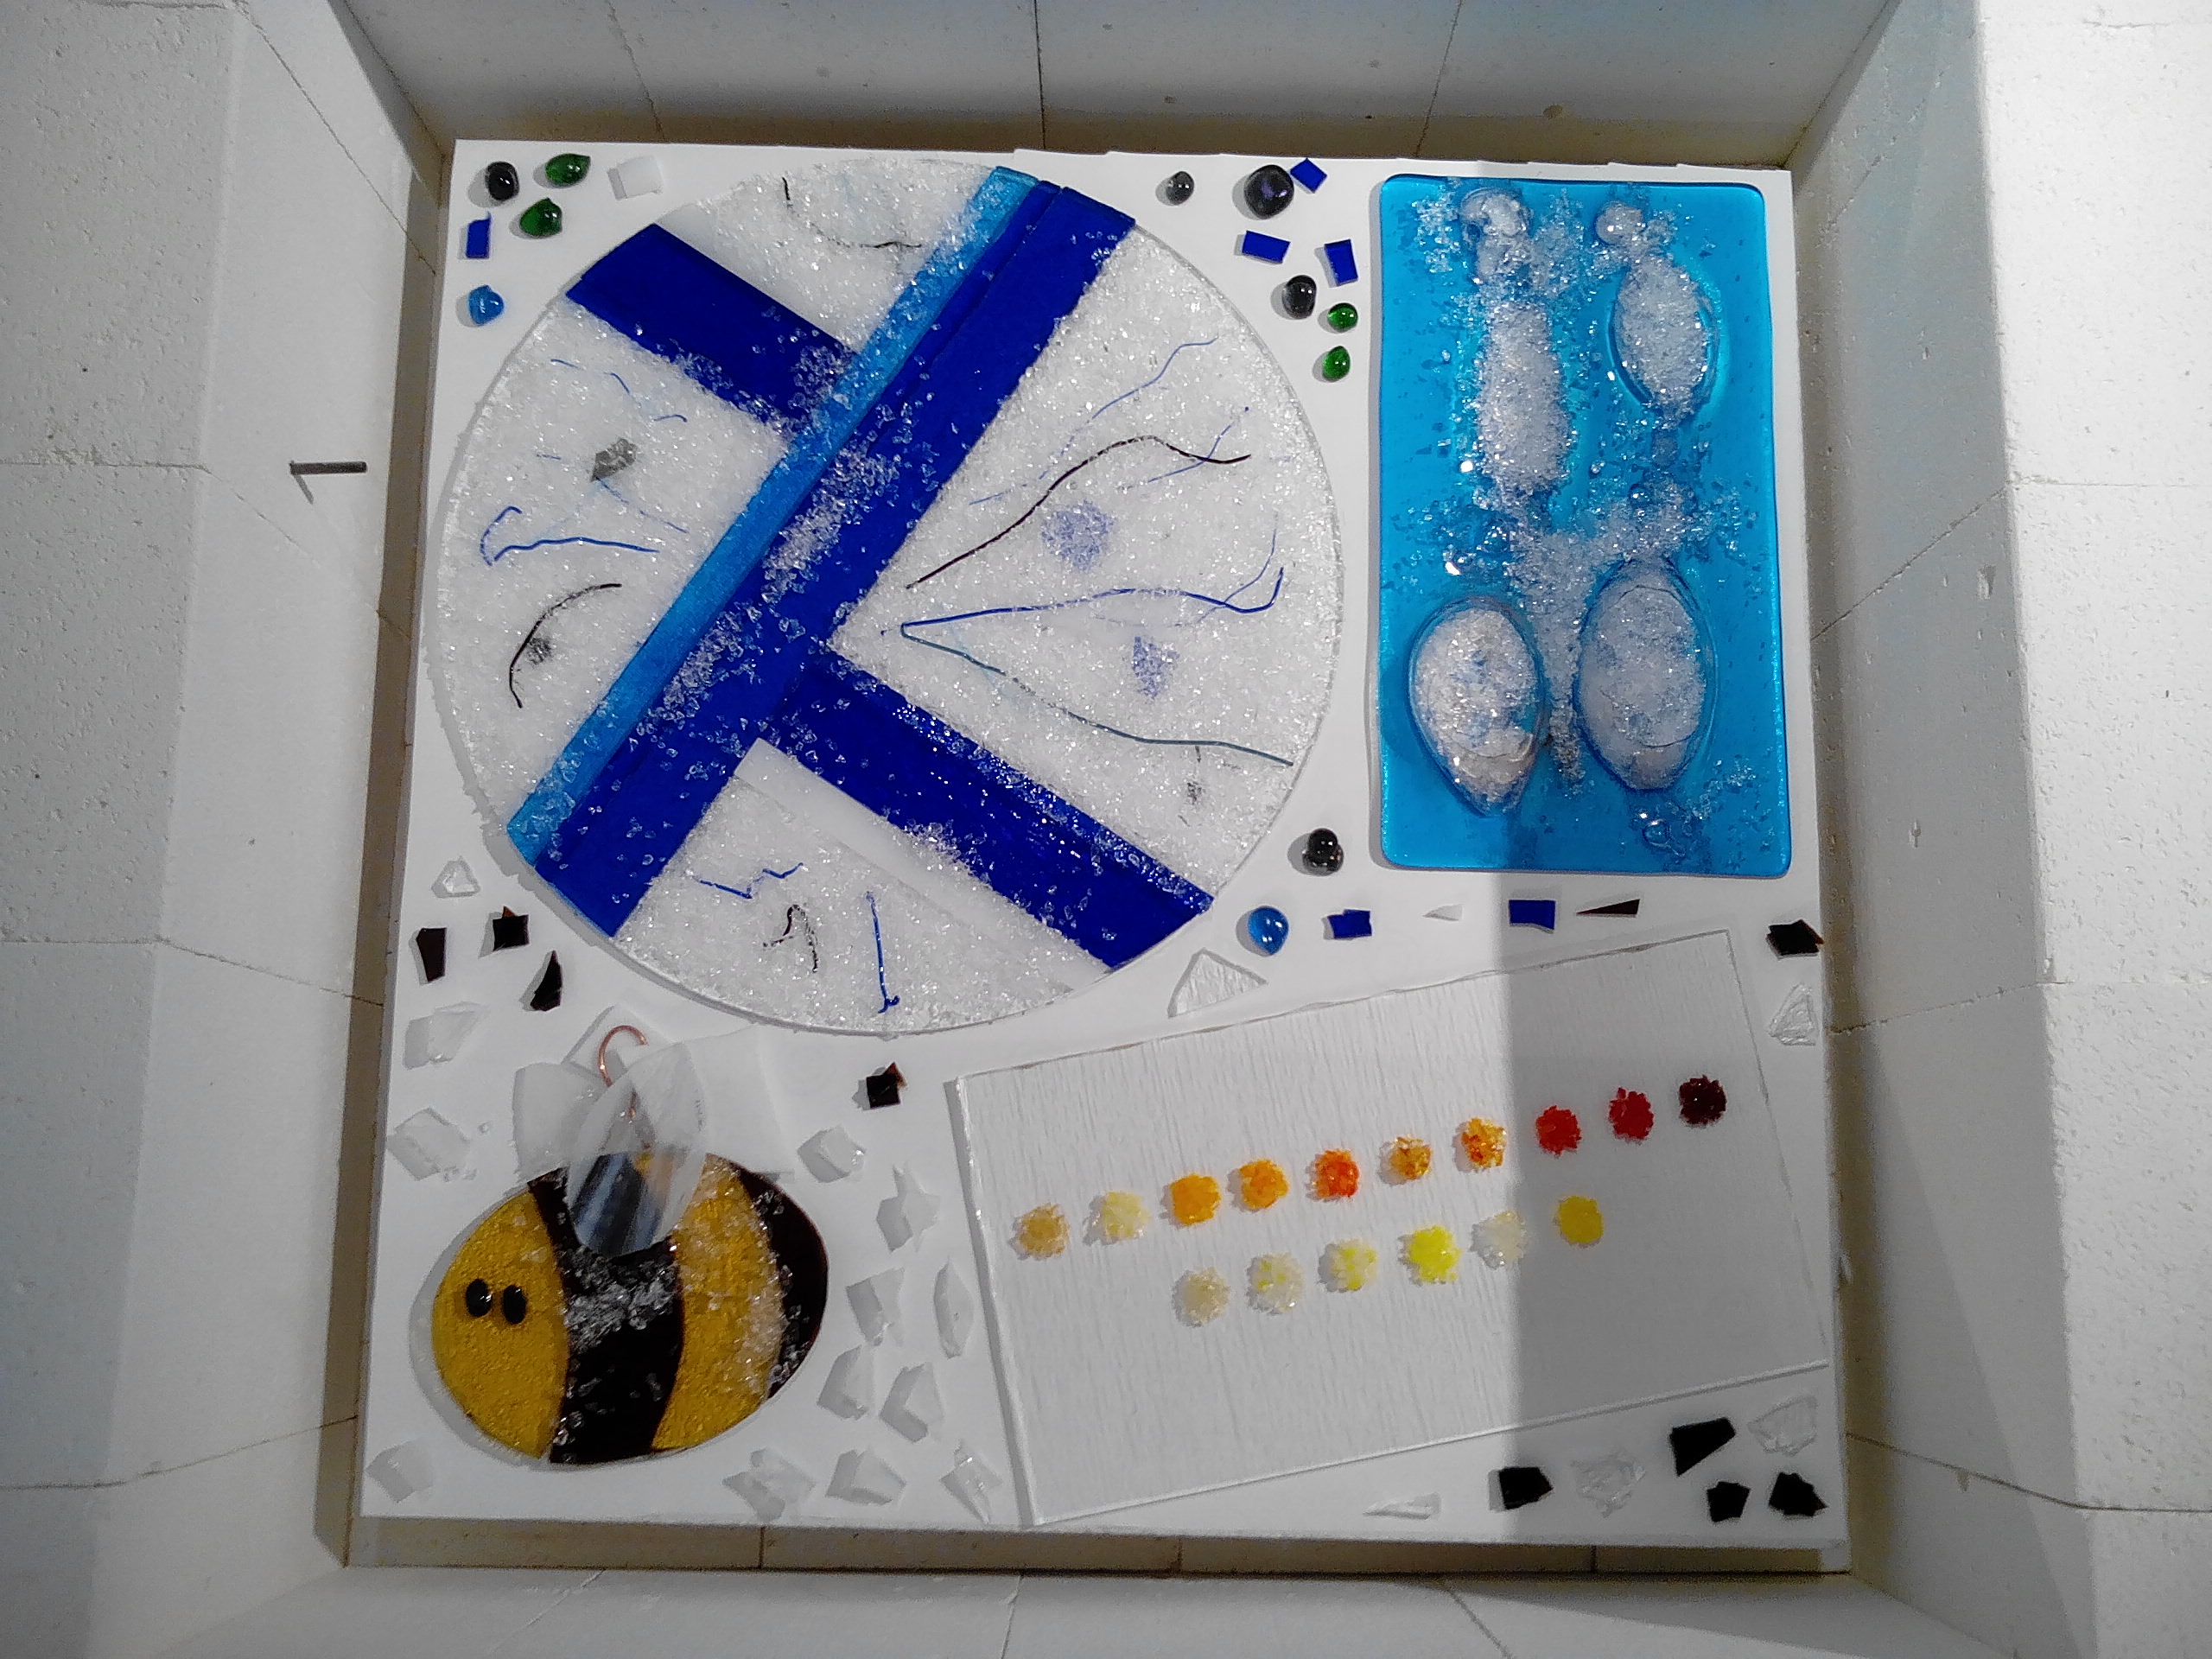
In the third picture they are in place. You can also see some ‘frits’, small glass chips, used to even out levels where glass has been added. This proved to be a mistake.


The next picture below shows the plate in the kiln. As always we are making use of every bit of space. This time we are making some beads from rough cut pieces of glass, a bee, and are refiring the ‘bubble’ glass, which I previously put too much baking soda on, making huge bubbles which burst.
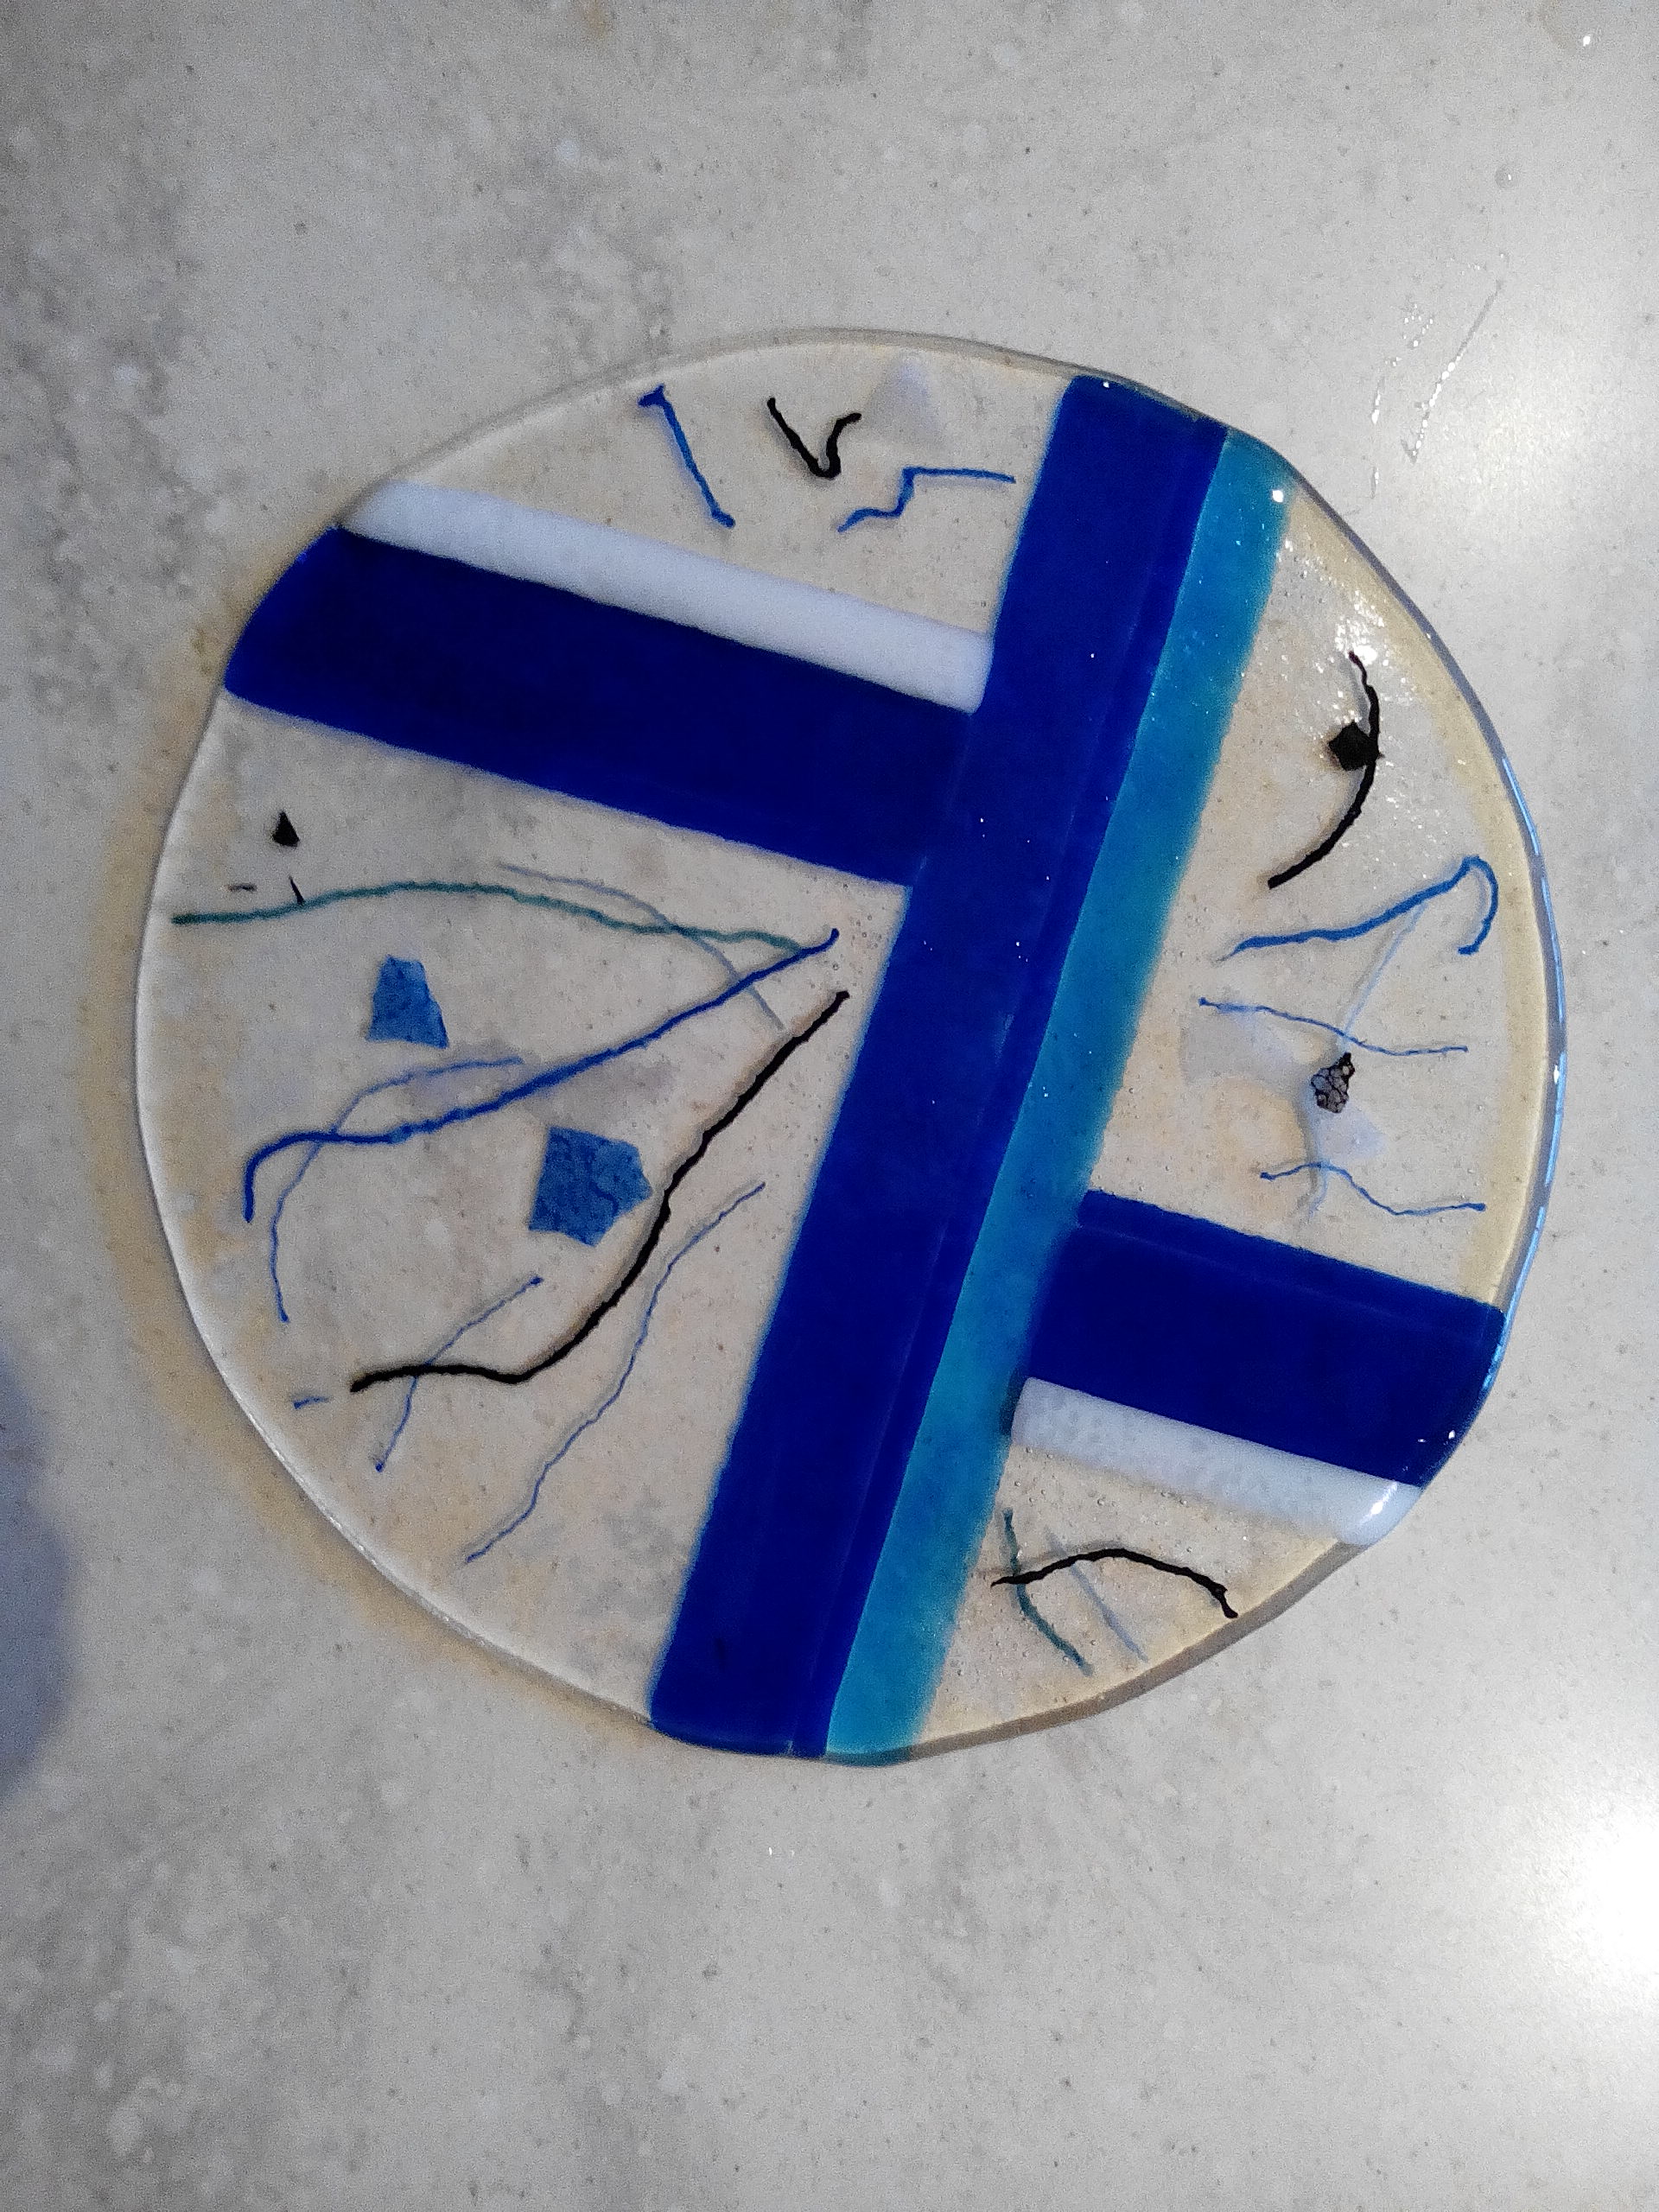
The final picture below is the plate post-firing. At this stage it is flat. Next it is put back into the kiln, at a lower temperature, to ‘slump’ it into a mould shaped like a plate. The final result is the picture at the top of this post.
There have been some lessons learnt. Most of which don’t show up in the photos:
- Don’t put clear frits over the top of coloured glass, at it leaves a ‘shadow’ that shows up in bright light. Put them only along the edges of added glass.
- Unlike stained glass work, avoid grinding edges to make them fit better. The result after firing is a dulled edge. It is much better to leave a less perfect, but clean, break.
- When adding glass over a clear sheet, and to the edge of the clear sheet, leave a gap. If you don’t then the bulk of the glass will produce a bulge along the edge.
Live and learn as they say.